In this article, i will try to do some recovery file.
Ok, i have one file for practice this forensics.

Next, i try to clone that file by using a command dd if=practical.floppy.dd of=/dev/fd0
i try to clone the practical.floppy.dd to the /dev directory. And the output filename is tesforensic. If succesfull, let's see the output file on the dev directory.


Next, i try to determining the structure of the disk of sda.

From the picture above, i can see the information of the sda disk.
Next i try to redirect the information above to a file. i put that file in penyidik directory. I give that file with name fdisk.disk1.
Next, i try to creating the image of the practice disk.

That command will take the /dev/tesforensic as the input file and writes the output file with name image.disk1 with the block size is 512. Next i change the permission of the image.disk1 to be the read only by using a chmod command.

Next i restore the image to the another disk.
I make the output file in the dev directory, i've named that output file with hasilforensic with block size 512.
After that i mount that cloned file and view the contents.
This is will mount the tesforensic file on /mnt/analisa. the -o ro is specified the options read only, noexec in order to protect the disk from you, and your system (and mount point) from the contents of the disk. loop command is to indicate that we want to use the loop device to mount the filesystem within the image file, and we specify a disk (partition) image rather than a disk device.
Now i try to hash the file of tesforensic with md5

That was the result of hashing file. Next i try to put that output of hashing file to the md5.disk1 file.

Now i try to hash the file of tesforensic with md5
That was the result of hashing file. Next i try to put that output of hashing file to the md5.disk1 file.
Next i mount the image.disk1 file to the /mnt/analisa directory


The find command starting in the current directory (signified by the “.”), any regular file (type f) and execute (exec)
the command md5sum on all files found ({}). Redirect the output to md5.filelist in the ~/penyidik directory. a directory penyidik i used to store the evidence file. The “\;” is an escape sequence that ends the –exec command. The result is a list of files from our analysis mount point and their md5 hashes. To see the hashes file i use the cat command.
the command md5sum on all files found ({}). Redirect the output to md5.filelist in the ~/penyidik directory. a directory penyidik i used to store the evidence file. The “\;” is an escape sequence that ends the –exec command. The result is a list of files from our analysis mount point and their md5 hashes. To see the hashes file i use the cat command.

To verify that nothing has been changed on the original floppy, i use the c option with md5sum. If the disk was not altered, the command will return “ok”.
The same can be done with the list of file md5

Now i want to view the content of the directory /mnt/analisa

This command will show all the hidden files (a), give the list in long format to identify permission, date, etc. (l). You can also use the –R option to list recursively through directories. You might want to pipe that through less.


Next, i use the command above and i redirect the output file to the directory penyidik
i also can get a list of the files, one per line, using the find
command and redirecting the output to another list file

I use the grep command on either of lists created by the first two
commands above for whatever strings or extensions that i want to look for.

command and redirecting the output to another list file
I use the grep command on either of lists created by the first two
commands above for whatever strings or extensions that i want to look for.

That command above looks for the pattern “jpg” in the list of files, using the filename extension to alert us to a JPEG file. The -i makes the grep command case insensitive.
After that i type a command

This
command find, starting in the current directory (signified by the
“.”), any regular file (type f) and execute (exec)
the command file on all files found ({}). Redirect the output to filetype.list in the ~/penyidik directory. Just use the cat command to see the content of filetype.list.
the command file on all files found ({}). Redirect the output to filetype.list in the ~/penyidik directory. Just use the cat command to see the content of filetype.list.

Then
i search all files on filetype.list that contain the string "image"
by using a grep command

Next
i try to use the string command. This command can
be used to parse regular ASCII text out of any file. I
try look at the contents of the practice disk on /mnt/analysis. There
is a file called arp.exe.
After
that i got the result like this

Ok.
dont forget to umount from the disk if you have been finished
exploring. Well next, i try to search the slack space and unallocated
space. You can see the definition of slack space and unallocated
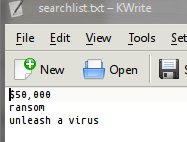
space in my previous article. The first thing i do, i make some list
of keywords to search for. I type a keyword $50,000, ransom, and
unleash a virus. These are some keywords and a phrase that i have
decided to use from the original letter received by the corporation
that i want to recover. I save that file as searchlist.txt and i put
it on ~/penyidik directory.
Next
i use the grep command to search from the image.disk for the pattern
from searchlist.txt and i redirect it to hits.txt file. The –a
option tells grep to process the file as if it were text, even if
it’s binary. The option i tells grep to ignore upper and lower
case. And the b option tells grep to give us the byte offset of each
hit so we can find the line in xxd.
After
that i see the content of hits.txt file. And i found like this.
Well
i will use xxd to display the data found at each byte offset. xxd is
a command line hex dump tool, useful for examining files. Do this for
each offset in the list of hits. This should yield some interesting
results if you scroll above and below the offsets.
From
the command above, i can see the result like this. Wow.

No comments:
Post a Comment